
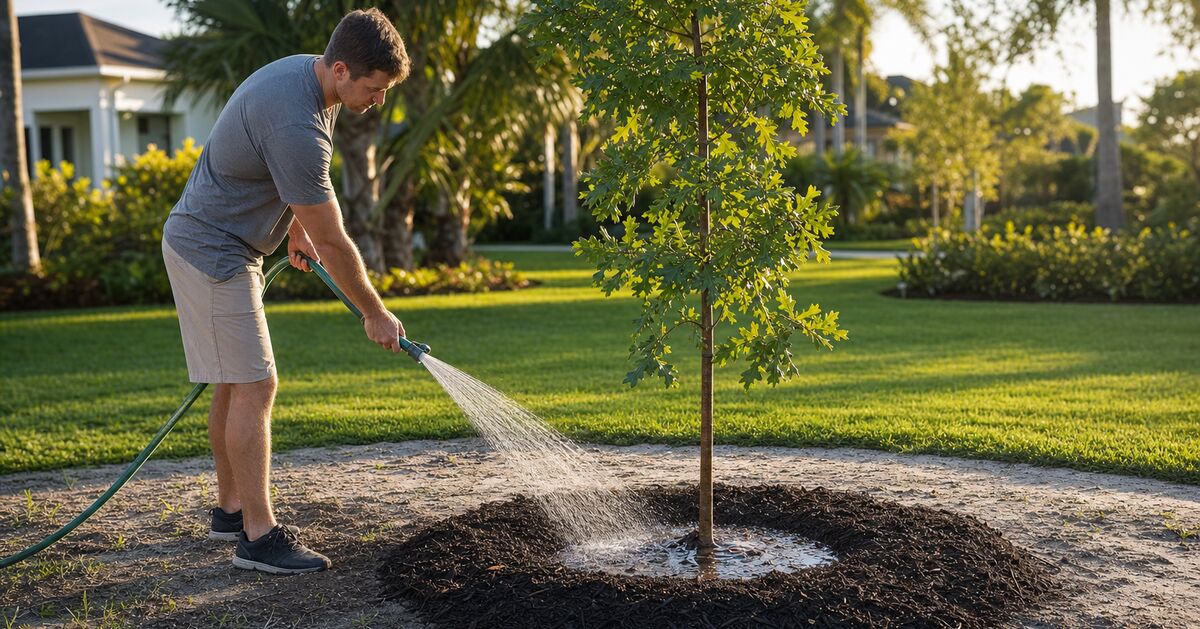
Florida has a way of humbling new plantings fast. A healthy-looking tree can arrive balled and burlapped on a Tuesday, look fine through the weekend, and be in serious decline by the end of the month - not because the tree was bad, but because the first few weeks went sideways. What happens in the 90 days after a tree goes into the ground is not just important: it is everything.
This post walks you through what tree establishment actually means, why the timeline matters in our specific Gulf-coast climate, and what proper watering and staking look like according to the standards that guide professional arborists.
What "tree establishment" actually means
When a tree is dug from a nursery, it loses a dramatic portion of its root system - often well over half. The burlap ball or container you receive holds only a fraction of the roots the tree had when it was growing in the ground. Until the tree regenerates enough roots to tap into the surrounding native soil, it cannot feed or hydrate itself the way a mature tree does. That period of root regeneration is what arborists call the establishment phase.
The USDA Forest Service and university extension services use a general rule of thumb: allow roughly one year of establishment time per inch of trunk diameter measured at breast height. A three-inch-caliper laurel oak, for example, may take three full years before it is truly self-sufficient. The first 90 days are the make-or-break window within that longer period - the stretch when the tree is working hardest to push new roots into your soil and when it has the least capacity to recover from a mistake.
In Sarasota, Venice, North Port, Englewood, and the rest of our service area, three local conditions make that window even more demanding than in other parts of the country.
Heat load. Florida's summer temperatures routinely push above 90°F. Transpiration - the process by which a tree loses water through its leaves - accelerates sharply with heat. A tree with a compromised root system simply cannot replace that water fast enough.
Sandy, fast-draining soil. Much of the Gulf coast sits on porous sandy substrate. Water moves through it quickly. That is good news for drainage, but it means moisture does not linger near roots the way it does in clay-heavy soils elsewhere. You water, and it disappears.
Wind exposure. Communities along the barrier islands and peninsulas - think Casey Key, Siesta Key, and Manasota Beach - see persistent onshore breezes that increase transpiration and physically stress a freshly planted tree's developing root anchorage. Our post on Casey Key and Siesta Key wind exposure covers this dynamic in more detail.
The watering schedule that actually works
There is no single prescription that fits every tree in every yard, but the University of Florida IFAS Extension (one of the most reliable sources for Florida-specific horticultural guidance) lays out a framework that professionals follow closely.
Week 1 and 2 - daily watering. The goal is to keep the root ball itself consistently moist. The root ball dries out faster than the surrounding native soil because its structure was disturbed during digging and transport. Water directly over the root ball, not just around the perimeter. For most residential trees in our area, this means applying water slowly for long enough that moisture penetrates the entire depth of the ball, not just the top few inches. A common mistake is running a sprinkler for five minutes and calling it done. The water needs to reach the lowest roots.
Weeks 3 through 12 - every other day, then tapering. As new roots begin to push outward into the native soil, you can begin to back off gradually. Many arborists recommend moving to every-other-day watering around the three-week mark, then to every three days by six weeks, and finally to two or three times a week through the 90-day mark. The tapering is important. If you drop from daily watering to once a week overnight, you are almost guaranteed to stress the tree.
Watch the tree, not just the calendar. Wilting, leaf curl, and premature leaf drop are early signs of drought stress. They may look dramatic, but they are the tree communicating. If you see them, water immediately and increase your frequency. Conversely, constantly soggy soil around the root zone can cause root suffocation and fungal problems - more on that in a moment.
Volume matters as much as frequency. As a general guide, many arborists suggest watering generously enough to moisten the full root ball depth, adjusting for trunk size and soil conditions rather than following a fixed gallon count. A two-inch-caliper tree, for instance, gets two to four gallons each time you water - not just a brief spritz.
Mulch is not optional. A ring of organic mulch two to three inches deep, kept from touching the trunk, dramatically slows moisture evaporation from the soil and moderates soil temperature. ANSI A300 Part 5 (Management of Trees During Site Planning, Clearing, and Construction) and UF/IFAS guidance both support mulching as a core establishment practice. Keep the mulch several inches away from the trunk flare - piling mulch against bark traps moisture and invites decay.
Overwatering: the mistake that looks like underwatering
A problem that comes up again and again in owner conversations is overwatering, which is ironic because the symptoms can look almost identical to drought stress. When a root zone is waterlogged, roots lose access to oxygen. Root cells die, the tree cannot uptake water even though plenty surrounds it, and the leaves wilt and yellow. At that point, adding more water makes things worse.
In low-lying areas of North Port, Nokomis, and Laurel - communities with naturally high water tables in the wet season - the risk of over-saturation is real. Before you install a tree, understand the drainage characteristics of your specific planting spot. Our blog post on clearing a wet lot and how standing water changes the job covers what saturated soil conditions mean for site work, and those same principles apply to planting.
If your yard floods during summer rainstorms and drains slowly, plant on slightly raised ground or choose a species with demonstrated tolerance for wet feet. A qualified arborist can help you match the tree to the microsite rather than fighting against it.
Staking: when it helps and when it harms
The instinct to stake a newly planted tree is understandable. You want it to stand up. But improper staking is one of the more quietly damaging things you can do to a new tree, and it is worth understanding the mechanics before you drive a stake into the ground.
Trees develop structural wood - the dense, reaction wood that makes trunks taper and flex without breaking - in direct response to movement. When the wind pushes a young trunk, the tree registers that mechanical stress and responds by laying down stronger wood at the base. A rigidly staked tree that cannot move at all builds almost no taper wood. Remove the stakes after a year, and you may have a tree that looks fine above ground but is alarmingly slender and weak at the base.
The ANSI A300 standards and guidance from the International Society of Arboriculture (ISA) are clear: stake only when necessary, stake as low as possible, and remove stakes as soon as the tree can stand on its own. The general benchmark for removal is 12 months or less - certainly no longer than the first growing season in most cases.
When staking is necessary. Trees in high-wind exposures, trees with a crown-to-root-ball ratio that makes them top-heavy, and trees on slopes where there is risk of the root ball physically rocking or heaving are reasonable candidates for temporary staking. Barrier-island properties in Osprey, Casey Key, and coastal Englewood often meet that threshold.
How to stake correctly. Use two or three stakes placed outside the root ball, never through it. Attach the tree with a flexible material - wide, flat straps or purpose-made tree ties, never wire, rope, or anything that can cut into bark. The attachment point should be as low on the trunk as possible while still achieving the needed support, and the tie should allow the upper trunk to flex two to three inches in any direction. That movement is not a failure of the staking - it is the point.
Check and remove on schedule. Stakes and ties that are left beyond a year become a hazard. Ties that were once loose will eventually girdle a trunk as it grows. Girdling cuts off the tree's vascular system and can kill a tree that was otherwise healthy. Set a calendar reminder when you install the stakes.
Michael Calabro, our ISA Certified Arborist (certificate FL-362432A), often notes that he sees more staking damage from ties left in place too long than from any other staking error. It is an easy problem to avoid once you know what to look for.
Root ball depth: getting the planting height right
Before any watering or staking conversation begins, the tree has to go into the ground at the correct depth. Planting too deep is a chronic problem that often does not show up right away, and a deeply planted tree may decline gradually over time.
The root flare - the point where the trunk visibly widens and transitions to root structure - should be at or just above the finished soil grade. If you cannot see the root flare after planting, the tree is almost certainly too deep. Over time, a buried flare leads to girdling roots, oxygen deprivation, and bark decay at the base. Our post on root collar excavation and air spading covers what happens when that problem goes undetected for years.
When backfilling, use the native soil you removed from the hole. Adding a lot of rich amendment to the backfill can actually discourage roots from growing outward into the native soil - they find the improved zone too comfortable and circle within it.
What to expect at the 90-day mark
At 90 days, a successfully established tree will have pushed new root tips beyond the original root ball and into the surrounding soil. You may not see much above ground - trunk caliper gain and canopy flush-out happen slowly. Do not mistake a modest-looking tree for a failing one. Below the surface, the real progress is happening.
At 90 days you can begin transitioning toward a normal irrigation schedule, though in our dry season (roughly November through May) supplemental watering remains important well into the second year. Continue monitoring for signs of stress, keep the mulch ring refreshed, and do not let anyone fertilize heavily during the first 90 days - excess nitrogen pushes top growth the root system cannot support.
If you have questions about whether a specific tree is right for your soil or lot position, our full list of tree care services covers assessments and consultations alongside installation work. You can also browse all of our service areas to see the communities we regularly work in across Sarasota and Charlotte counties.
When to call an arborist
If a newly planted tree begins dropping leaves heavily, developing bark lesions, or showing tip dieback before the 90-day mark, do not wait to see if it recovers on its own. Early intervention - whether it is adjusting the irrigation, checking for root girdling, or diagnosing a pest or fungal issue - is far more effective than addressing a problem that has had months to develop.
Our team works across Sarasota, Venice, North Port, Osprey, Nokomis, Englewood, Siesta Key, Laurel, and neighboring communities. If you are in any of those areas and a new tree is giving you concern, get in touch with us before the window to correct the issue closes.
For more guidance on tree care across the Gulf coast, browse the rest of our blog or visit our frequently asked questions page where we address the questions homeowners ask us most often.
The short version
A new tree does not take care of itself. In Florida's heat and wind, with our sandy soils and long dry seasons, the first 90 days of deliberate, attentive care determine whether your investment survives or quietly fails. Water slowly and deeply, taper off gradually, stake only if needed and remove stakes on schedule, plant at the correct depth, and keep the mulch ring in good shape. Those steps, done consistently, give a tree a genuine chance to become what you planted it to be.
Got a tree that worries you?
Free, no-pressure on-site estimate across Sarasota & Charlotte Counties.